How to Run Fusion 5 on Red Hat’s OpenShift
Last year, we released cloud-native Fusion 5, an update to our flagship search and AI platform built on a microservices architecture to support modern devops and distributed scale. At the core of Fusion 5’s architecture is Kubernetes, which enables dynamic management of application resources as utilization ebbs and flows and allows for better cost optimization in the cloud. As we continue to work with large enterprises on their digital transformation journeys, we’ve been exploring how best to leverage Fusion 5’s modern architecture for environments that are behind the firewall.
Some of our customers have been able to easily deploy Fusion 5 using public cloud platforms like Google Kubernetes Engine (GKE). However, there are still many organizations that must use hybrid or private cloud environments because they have legacy systems or deal with sensitive data and compliance regulations.
On-premise data centers are complex, and there is no one-size-fits-all deployment architecture. One solution we’ve been recommending for these customers deploying Fusion behind the firewall is Red Hat’s OpenShift. OpenShift allows customers to take advantage of Fusion 5’s flexibility while adhering to compliance standards.
OpenShift Helps Companies Modernize Operations
Compared to using a managed Kubernetes platform in the public cloud, an on-prem DIY Kubernetes installation is a complex project. Managing Kubernetes infrastructure yourself involves a lot of configuration and synchronization between systems and processes that most teams don’t have the expertise for.
OpenShift offers a managed Kubernetes option that can be deployed in private or hybrid cloud environments, allowing organizations to take advantage of their existing data centers while modernizing operations. Since version 3.x, OpenShift has been built for native Kubernetes, enabling straightforward installation and management of Fusion 5.
The rest of this post is intended for technical users who want to try deploying and managing Fusion on OpenShift. Lucidworks Fusion can be accessed through the following steps, and comes with a 30-day trial license. If you are interested in using Fusion in production for longer than that, please get in touch with sales.
Getting Started With Fusion on OpenShift Deployment Using Projects
The process of deploying Fusion on OpenShift is nearly identical to that of other Kubernetes platforms. In this post, I will walk through how to deploy Fusion against an OpenShift project rather than using a Kubernetes namespace (although, namespaces are automatically created with every project). Project templates can help standardize deployments by associating OpenShift objects such as rolebindings, resource quotas, and network policies to fit your requirements.
First, create a new project within your OpenShift console by navigating to the projects section and clicking “Create Project”. This will create a corresponding namespace with the same name.

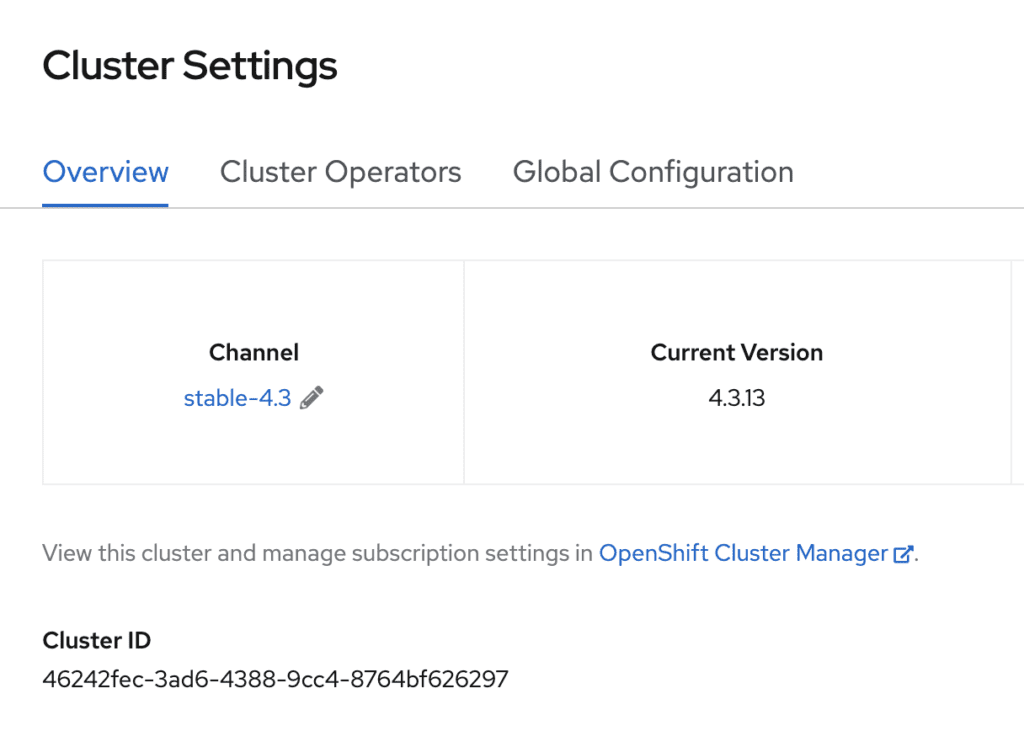
Take note of the cluster ID in the OpenShift console under Administration -> Cluster Settings. We will use this value as input for the next steps.
Clone or download the Github fusion-cloud-native repository locally.
git clone git@github.com:lucidworks/fusion-cloud-native.git
To deploy Fusion 5 against our OpenShift cluster, we will use the setup script provided in the local copy of the repo. Please see https://github.com/lucidworks/fusion-cloud-native#redhat-openshift
Navigate to the local copy and execute the setup script using the cluster ID of your OpenShift cluster
./setup_f5_k8s.sh -c 46242fec-3ad6-4388-9cc4-8764bf626297 -n fusion-5-dev --provider oc
This process will take around 10 min to deploy all of the Fusion pods.
Verify that all the pods have been successfully deployed in the OpenShift console under Workloads -> Deployments, or through the command line
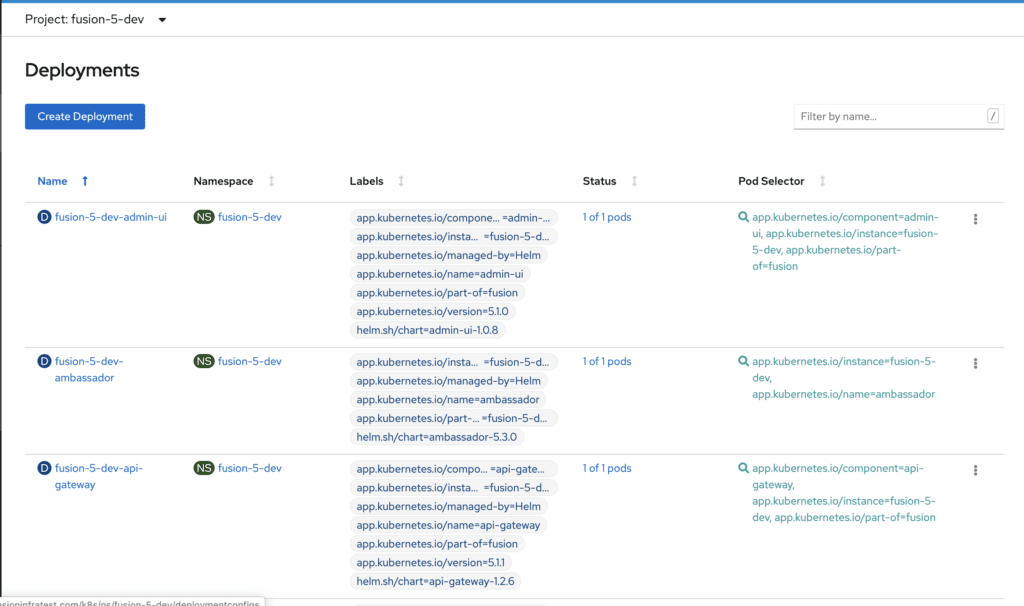
oc get pods
NAME                                                READY   STATUS    RESTARTS   AGE

fusion-5-dev-admin-ui-766bf85bdc-g7ntr              1/1     Running   0          18h

fusion-5-dev-ambassador-6fc95684d9-xp8bs            1/1     Running   0          18h

fusion-5-dev-api-gateway-65f8f7d68b-ddvgb           1/1     Running   0          18h

...
Routes for Fusion Services
Fusion has several services including Admin UI and REST API with endpoints that can be accessed via HTTP/HTTPS. We will leverage OpenShift Routes to expose these services on the OpenShift HAProxy load balancer. Creating Routes can be done through the OpenShift console or by using the oc cli.
In this example, we create an unsecured Route to the Fusion proxy which will expose the admin console and REST API. These examples assume that a cloud domain is configured which always resolves to the OpenShift router.
Create a route using the Openshift console or oc command.
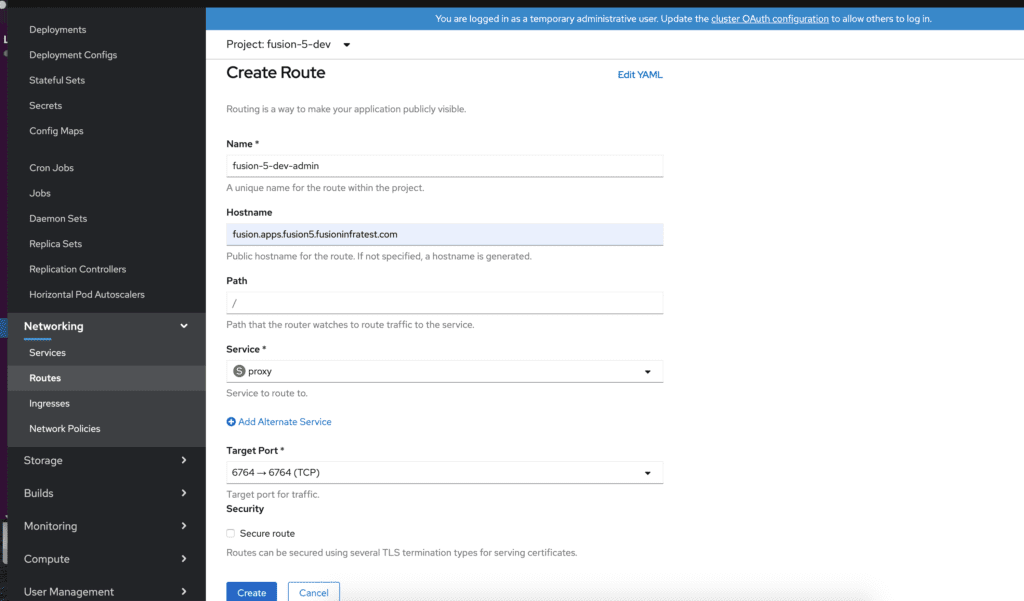
oc expose svc/proxy --hostname=fusion-admin.example.com
Manage Network Policies for Fusion
Network policies govern how groups of pods are allowed to communicate with each other and other network endpoints. With Fusion, it’s expected that all incoming traffic flows through the API Gateway service. The gateway provides the internal JWT which all Fusion services expect with each request. If you require specific network traffic rules for any of Fusion’s services, then network policies can provide this functionality.
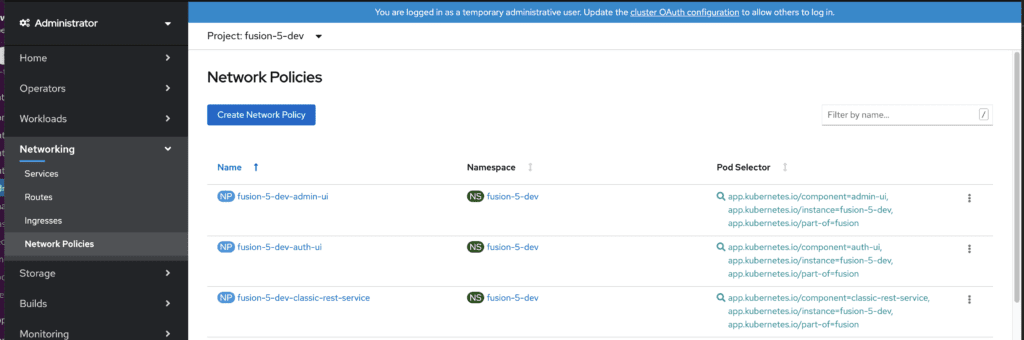
OpenShift makes it easy to view and edit network policies for a given project. In the following example, we will enable the predefined network policies for an existing Fusion deployment and modify the classic-rest service to allow egress traffic to an smb server for our smb datasource.
1. Enable predefined Fusion network policies
A. Open the generated fusion_values.yaml from the local copy of the repo. This file will have the Openshift cluster and Project ID as a prefix.
B. Add the following entry under the global settings and save
global:
networkPolicyEnabled: true
C. Run the setup script with the “–upgrade” option
./setup_f5_k8s.sh -c <clusterID> -n <namespace> --provider oc --upgrade
D. Once the process completes, verify that the Network Policies are present by selecting the Fusion project in the Openshift Console and navigating to Networking -> Network Policies
2. Modify the existing classic-rest Network Policy
A. On the Network Policies page, select the “classic-rest-service”
B. Select the YAML view

C. Add a new entry for allowing traffic to the smb server
- to:

-ipBlock:
cidr: "34.210.17.134/32"
ports:
- protocol: TCP
port: 139
- protocol: UDP
port: 139
- protocol: TCP
port: 445
- protocol: UDP
port: 445
D. Save the configuration update to the Network Policy
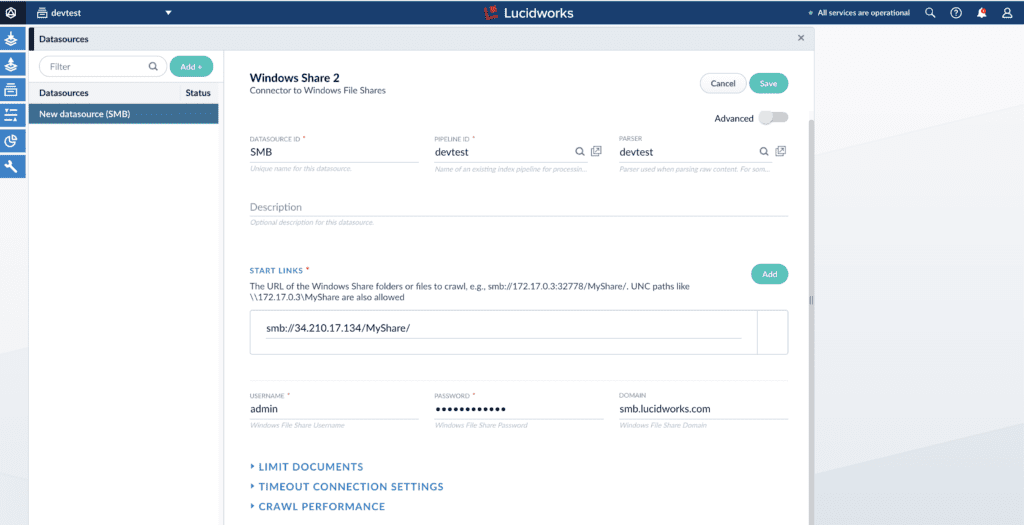
3. Configure the smb datasource in the Fusion UI and run the connector job.
Conclusion
If you followed along to this point, you should have the latest Fusion 5 up-and-running on OpenShift, and hopefully were able to index some of your data. There are many resources available in the OpenShift and Fusion documentation that can help you plan your deployment. Contact us for more information about how to move your deployment to production and use Fusion beyond the 30-day trial license period.