How to Highlight Search Terms Using Query Workbench
In this “From The Field” series, we’ll explore the Query Workbench within Fusion Server and walk through helpful tips and tricks on making the most of your search results. This post discusses how to quickly (in less than five minutes) highlight search terms within search results and explore other available highlighting features. Let’s start the timer:

What Is Highlighting?
When users are presented with search results, they often see snippets of information related to their search. Highlighting reveals the keywords inside those snippets of results so the user can visually see the occurrences. This functionality enhances the user experience and usability of search results.
Basic Highlighting
To get started, we’re going to use a previously built Fusion App that performed a website crawl of lucidworks.com. After logging in to Fusion, selecting our app, and opening the Query Workbench from the Querying menu, we’ll be presented with the crawled documents.
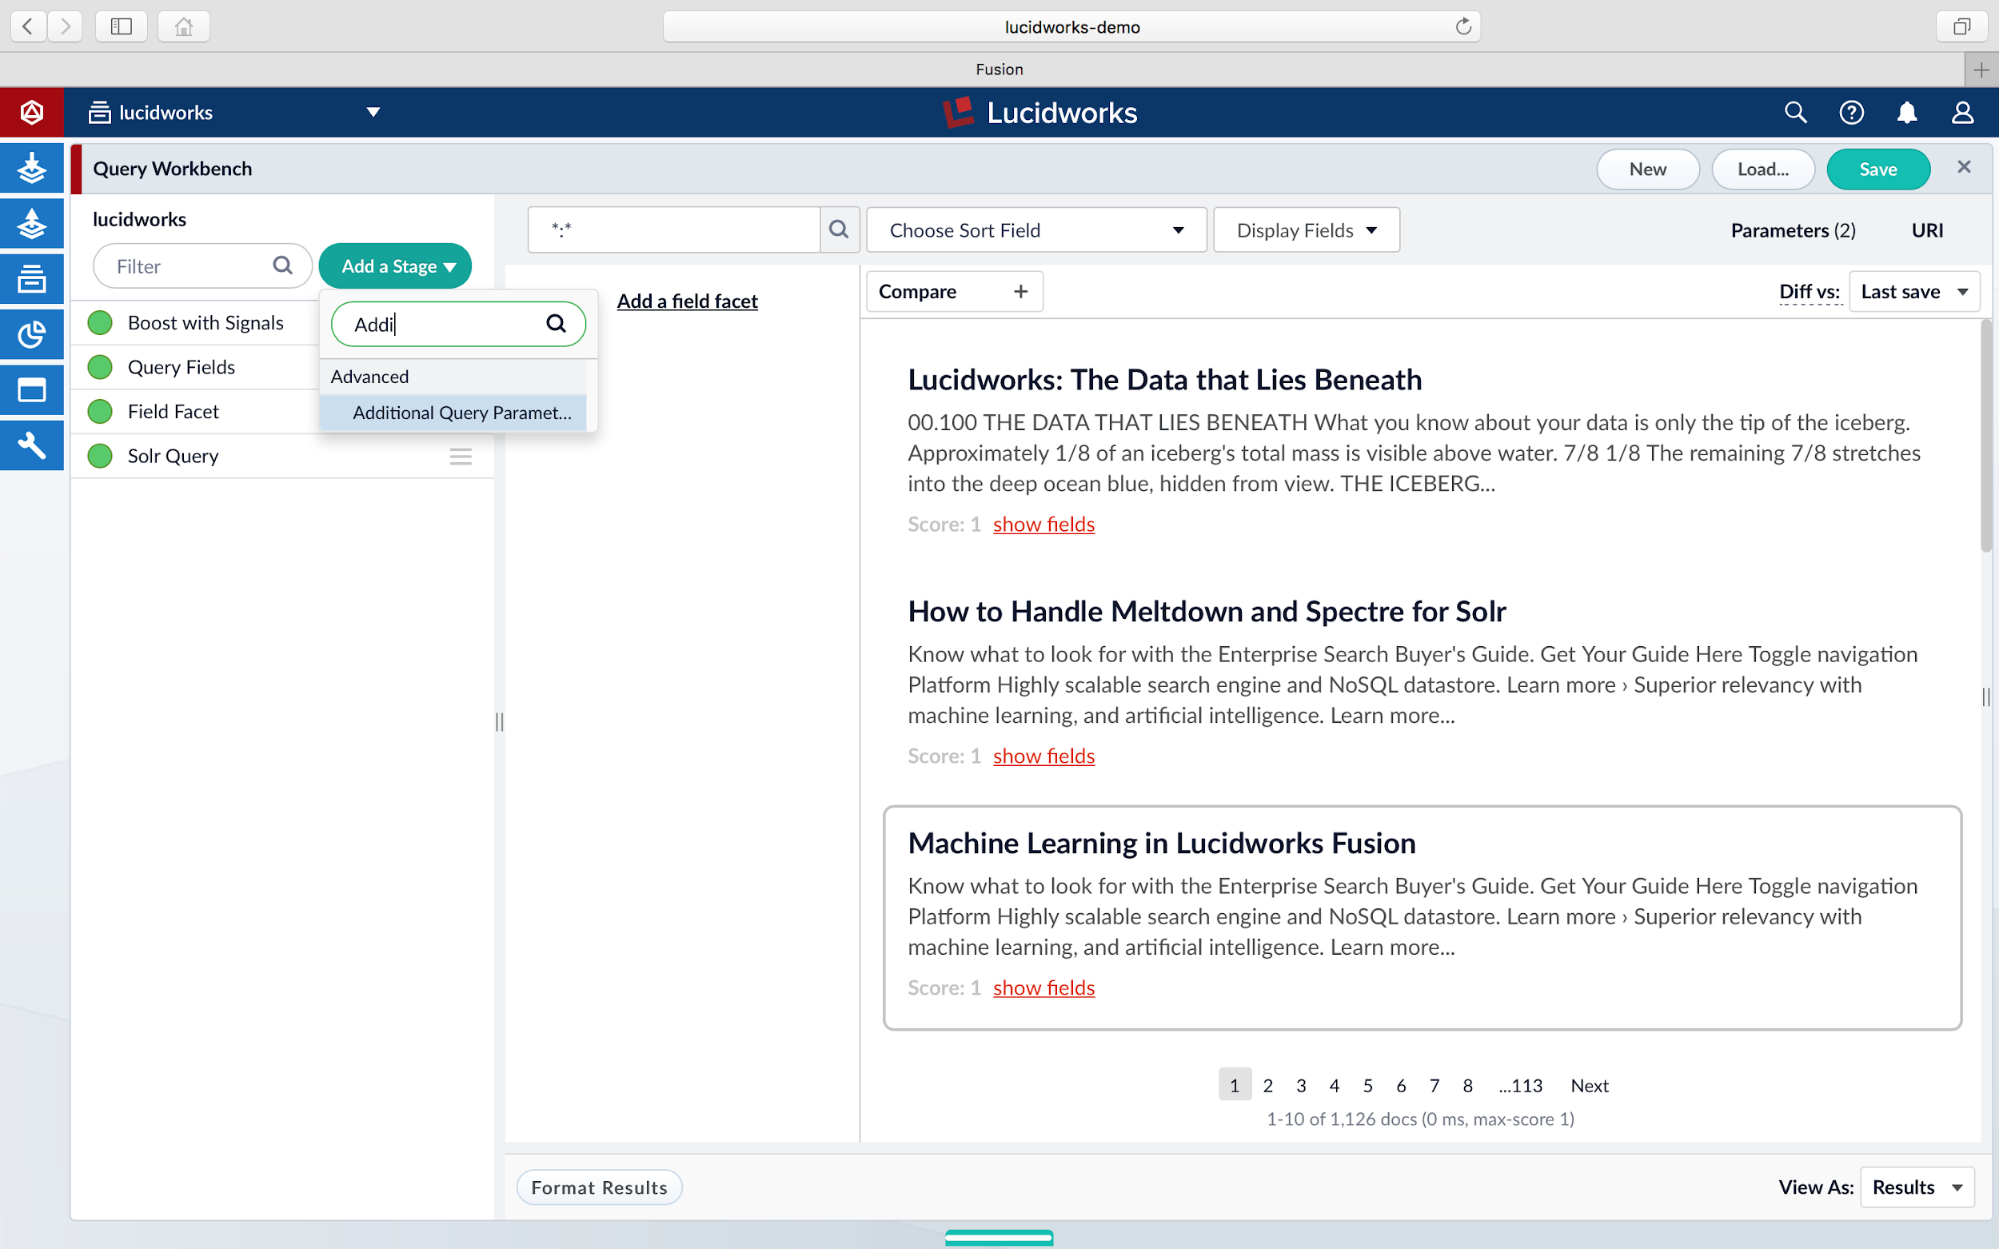
The highlighting features are driven by Solr query parameters, through the Additional Query Parameters stage. Open the Add a Stage dropdown menu and select Additional Query Parameters to add the stage to the Query Pipeline. (Click here for Query Pipelines documentation).
On the Additional Query Parameters stage, name the stage by adding a label, such as “Highlighting.” We’ll begin by adding the two required Solr parameters (hl and hl.fl):
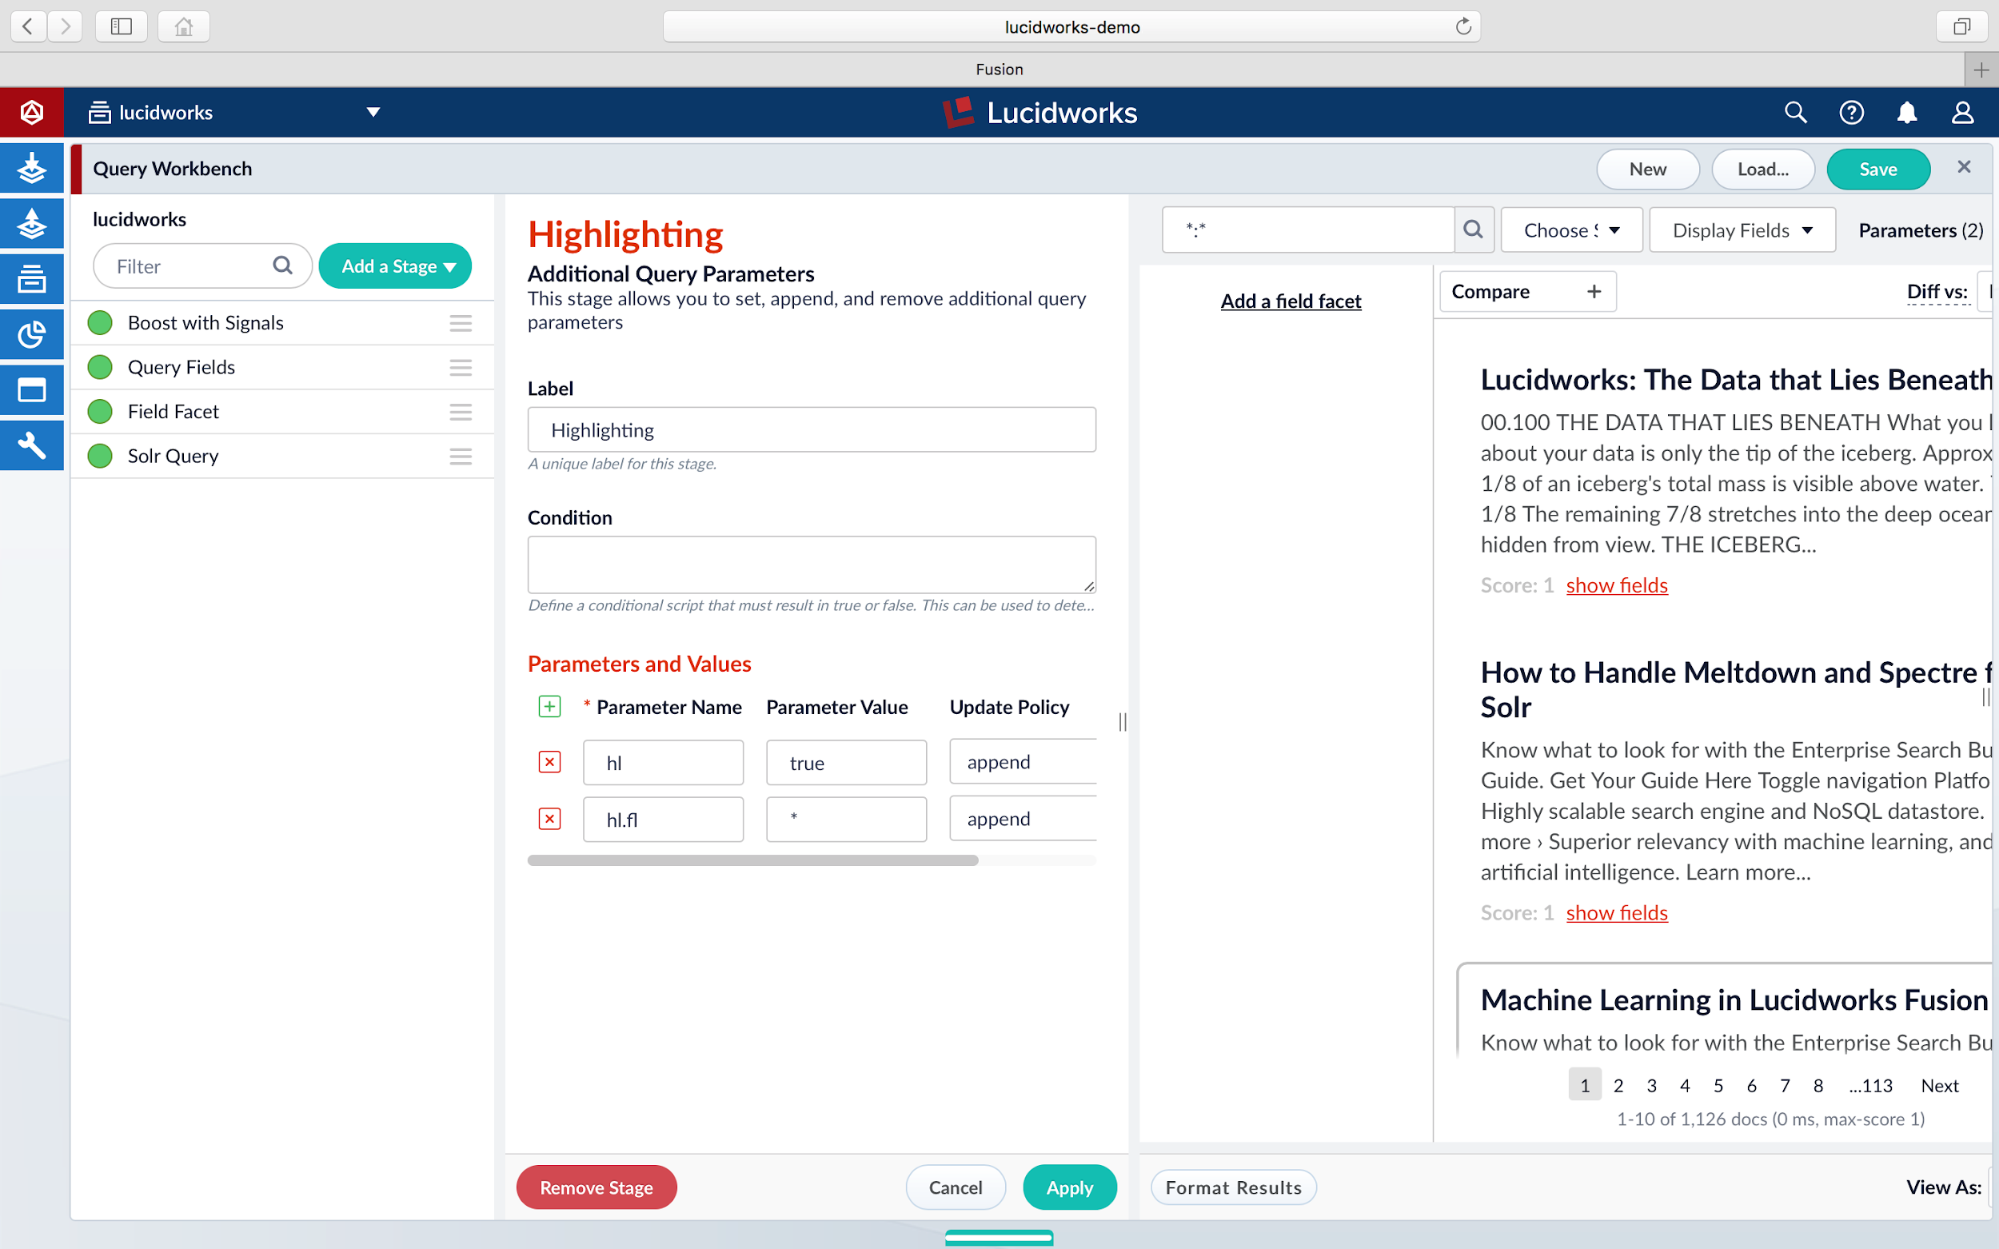
We give the hl parameter a value of true to enable the highlighting, and the hl.fl (field list) parameter a wildcard value of * to match all fields where highlighting is possible. In production, you will want to explicitly define the fields to match. Click Save to apply the changes. Hint: You can click the Cancel button to close out the stage panel.
By default, the Query Workbench does not display highlighted results. To enable display of highlighted results, open the Format Results options at the bottom and check the Display highlighting? option. Click Save to apply the change.

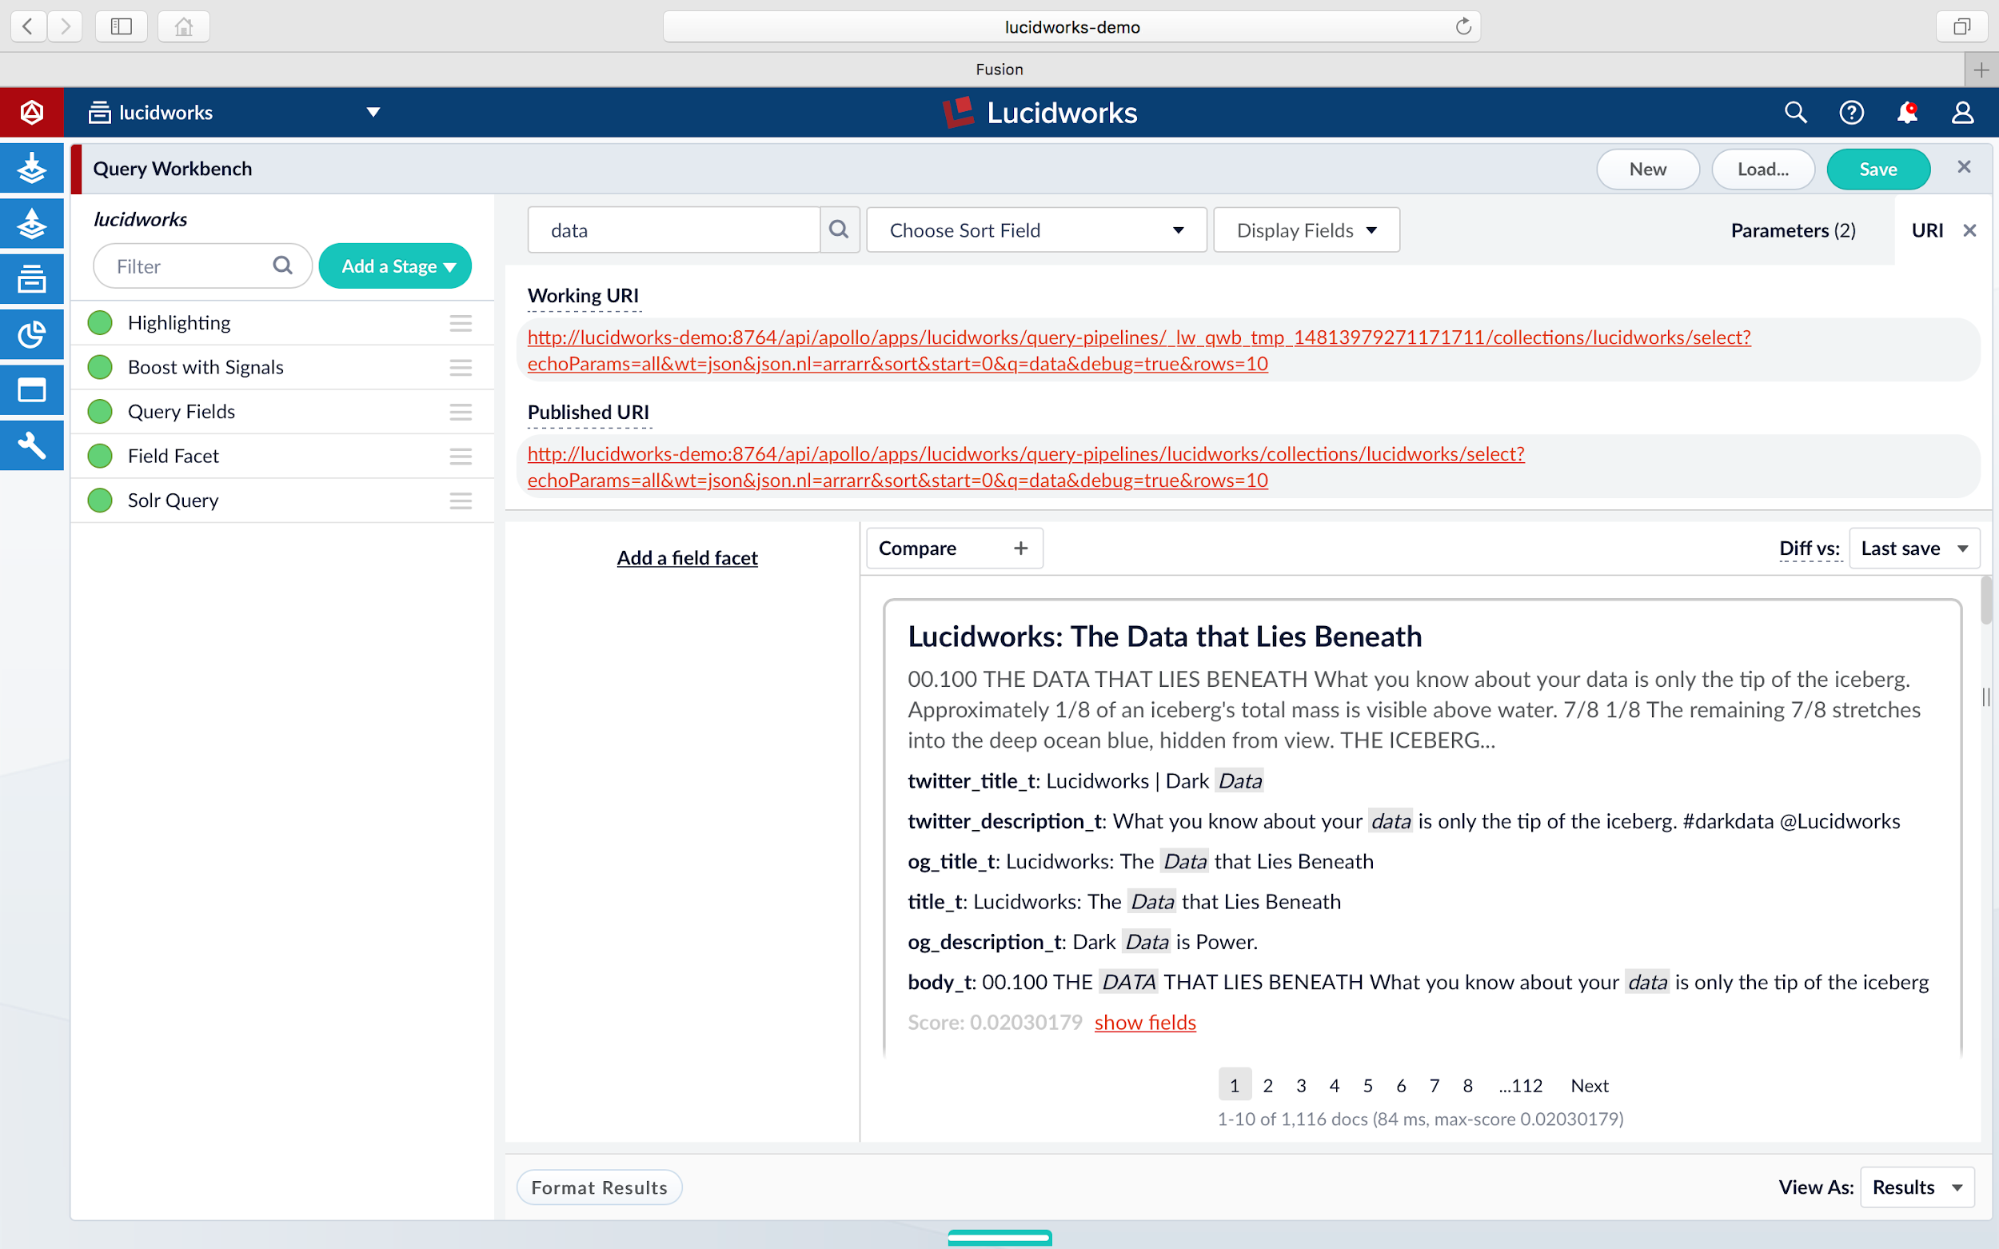
Now let’s test a query to see the highlighting in action. In our query field, we’ll perform a search for data:
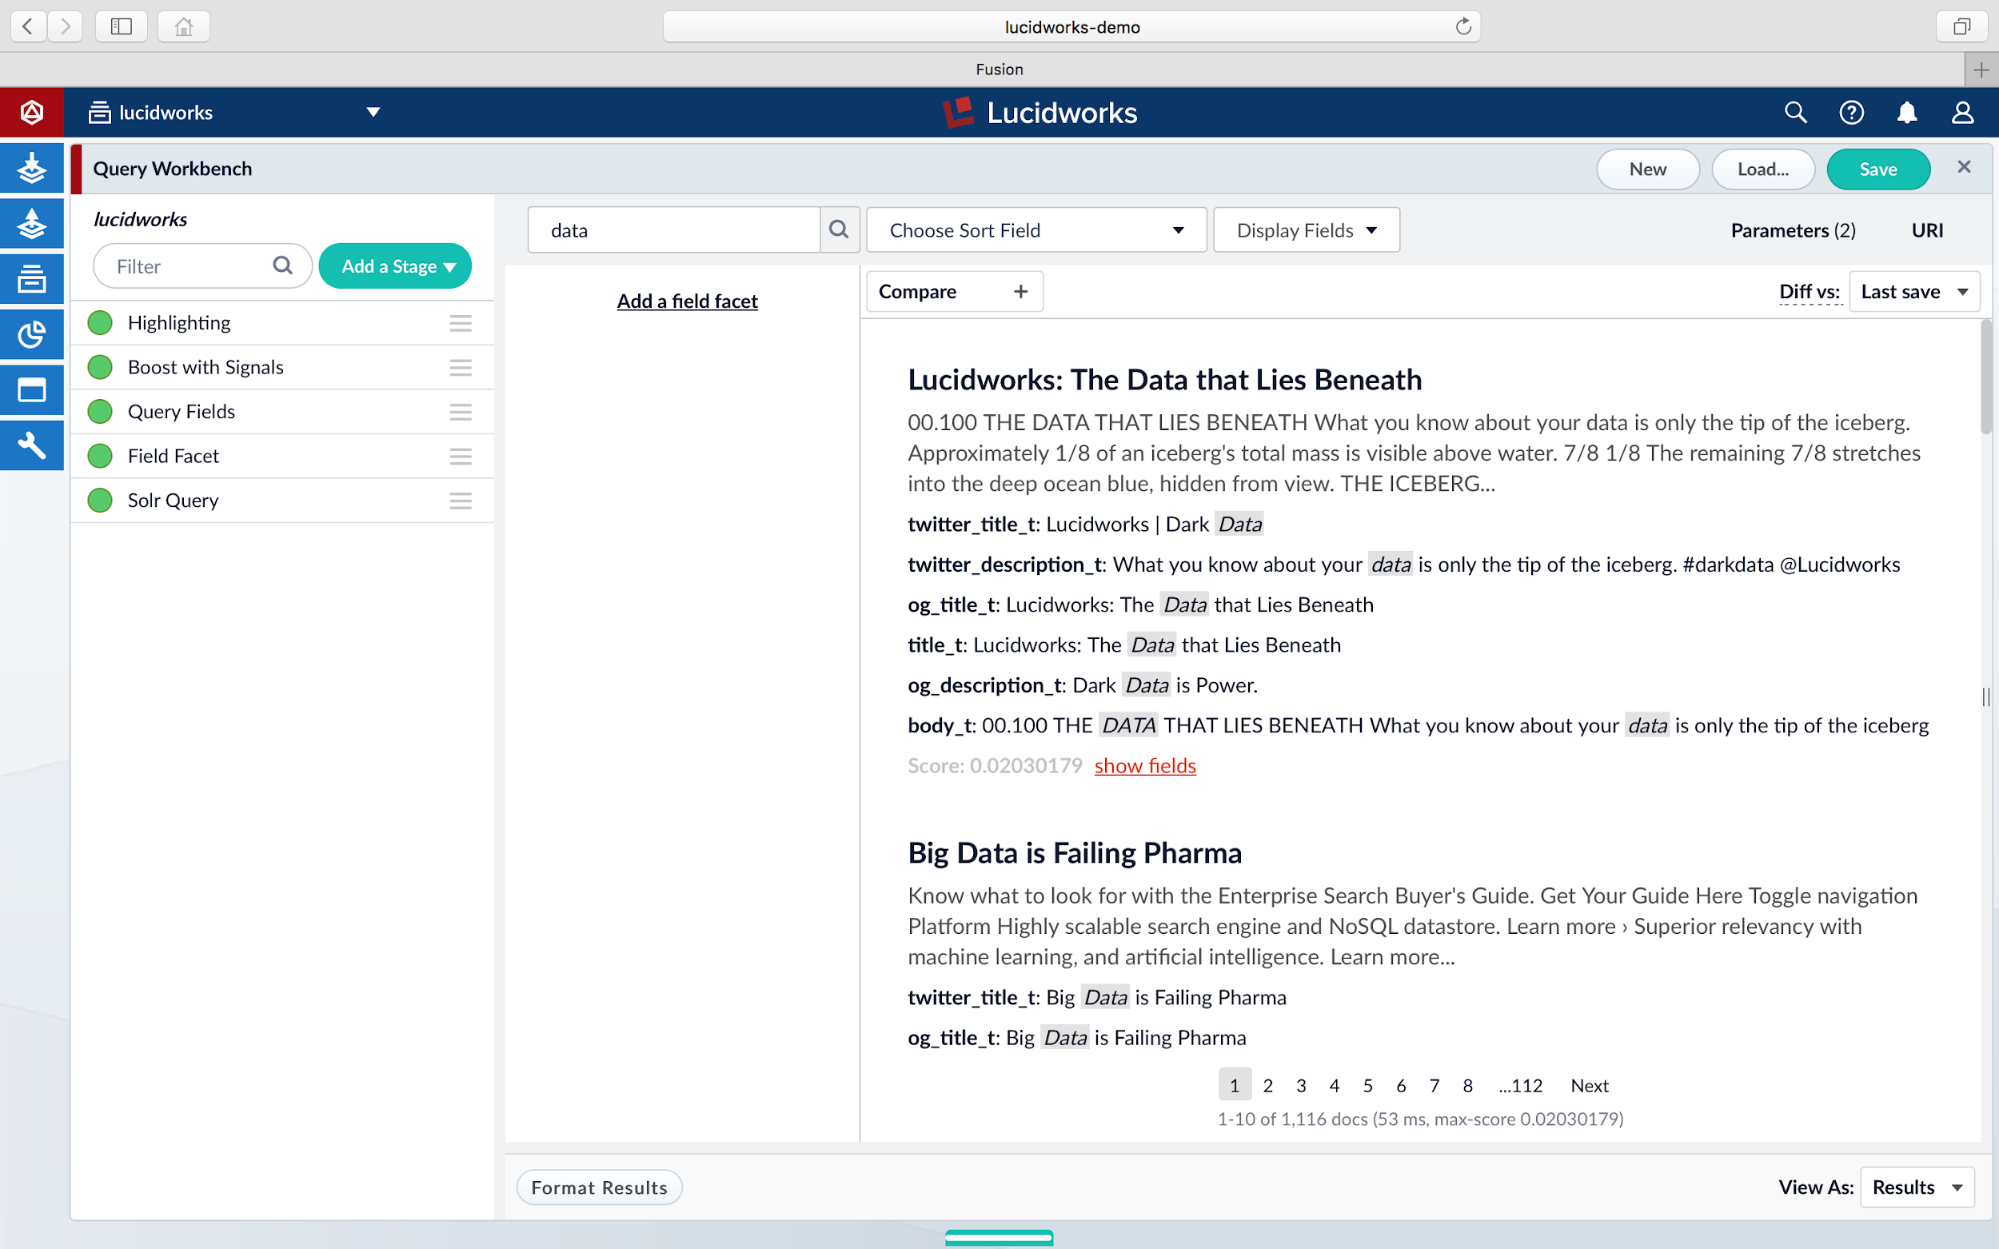
We can now see matches from the query being highlighted, as well as the fields which contain the matches. The actual highlighted fragments as seen under the result in the Query Workbench belong to the highlighting section of the response header. To view the response, click on URI tab and copy/paste the Working URI into a new browser tab:
This Query Pipeline API response provides a highlighting section for each document with the matching snippets per field:
{
"debug": {
...
},
"response": {
...
},
"responseHeader": {
...
},
"highlighting": {
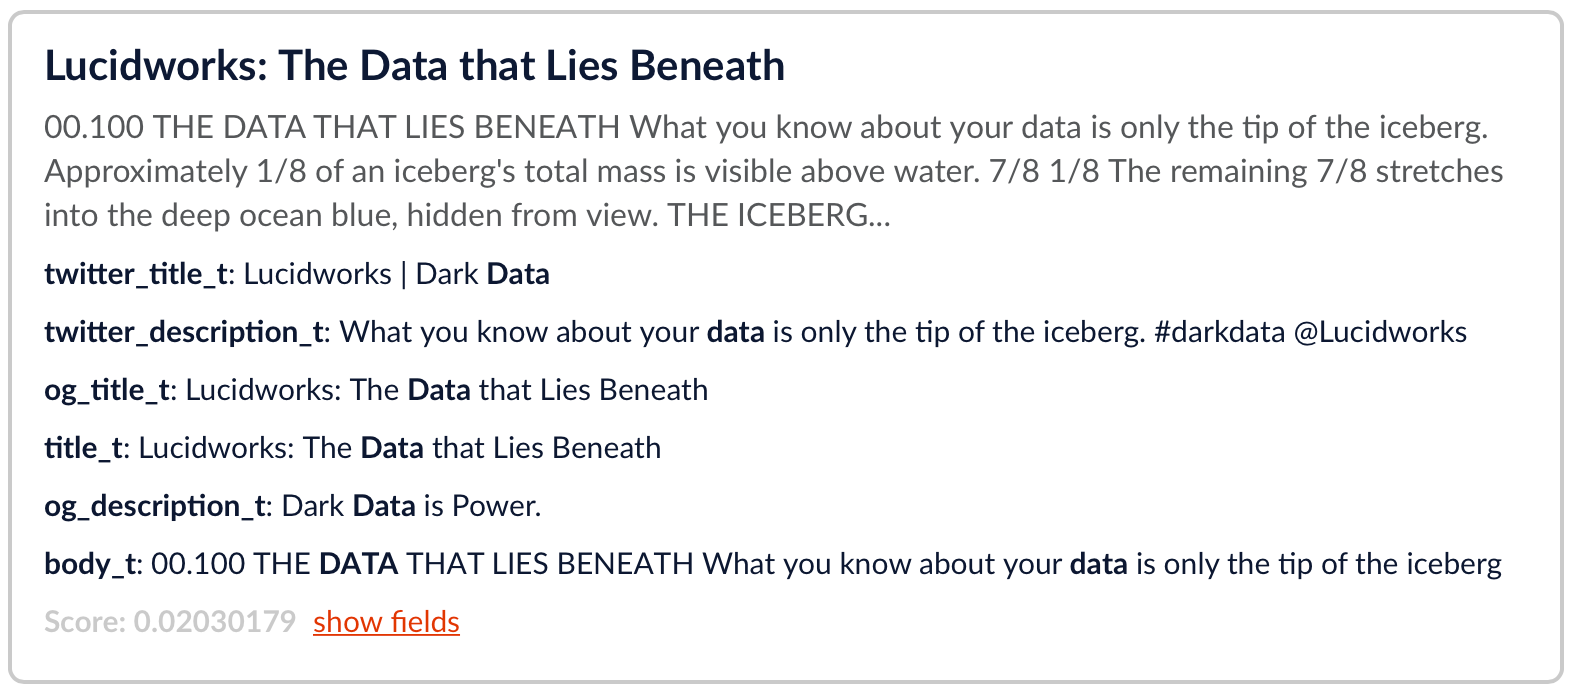
"https://lucidworks.com/darkdata/": {
"twitter_title_t": [
"Lucidworks | Dark <em>Data</em>"
],
"twitter_description_t": [
"What you know about your <em>data</em> is only the tip of the iceberg. #darkdata @Lucidworks"
],
"og_title_t": [
"Lucidworks: The <em>Data</em> that Lies Beneath"
],
"title_t": [
"Lucidworks: The <em>Data</em> that Lies Beneath"
],
"og_description_t": [
"Dark <em>Data</em> is Power."
],
"body_t": [
"00.100 THE <em>DATA</em> THAT LIES BENEATH What you know about your <em>data</em> is only the tip of the iceberg"
]
},
"https://lucidworks.com/2018/06/25/big-data-failing-pharma/": {
"twitter_title_t": [
"Big <em>Data</em> is Failing Pharma"
],
"og_title_t": [
"Big <em>Data</em> is Failing Pharma"
],
"title_t": [
"Big <em>Data</em> is Failing Pharma"
],
"og_url_t": [
"https://lucidworks.com/2018/06/25/big-<em>data</em>-failing-pharma/"
],
"body_t": [
" machine learning, and artificial intelligence. Learn more › Quickly create bespoke <em>data</em> applications for"
],
"article_section_t": [
"Big <em>Data</em>"
]
},
...
},
"facet_counts": {
...
}
}
Using a tool such as Fusion App Studio, highlighting will be parsed and displayed automatically on the front-end UI. For custom UI integrations, the Query Pipeline API’s response with highlighting information can be easily parsed for presentation.
Additional Highlighting Parameters
Up to this point, we’ve only looked at enabling highlighting and using default parameters to demonstrate core functionality. However, when deploying in production, we may be more selective with the fields that require highlighting, the tag to use before and after a highlighted term and choosing a specific highlighter based on our needs.
When choosing a highlighter, be conscious of index costs to store additional highlighting features. For example, besides the stored value, terms and positions (where the highlighted terms begin and end), the FastVector Highlighter also requires full term vector options on the field. Therefore, the speed of the search may affect execution time performance. See the Solr Highlighters section below for more information.
Snippets
By default, only one snippet is returned per field. The parameter hl.snippets controls the number of snippets that will be generated. For example, the default value of 1 returns the following:
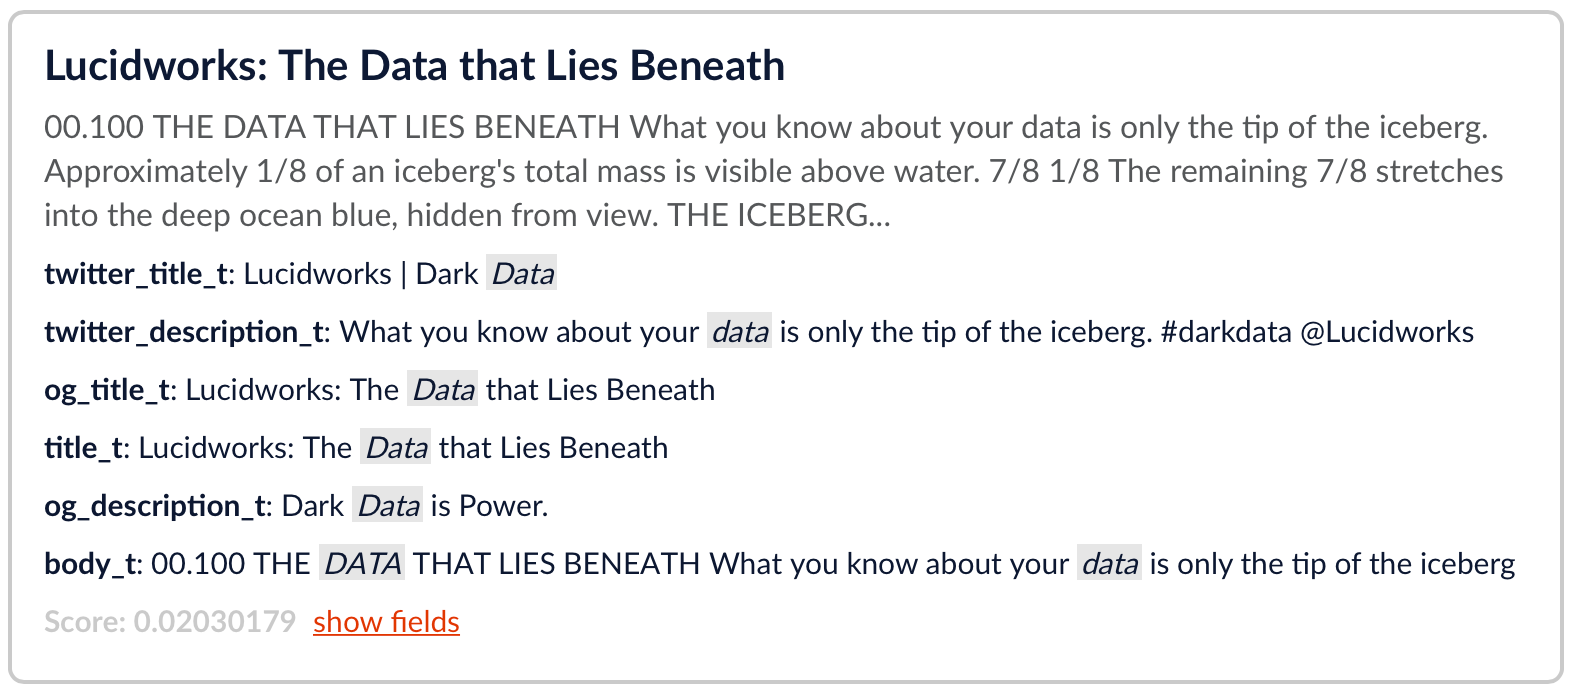
When this value is increased to 3, additional snippets within the body_t will be highlighted:
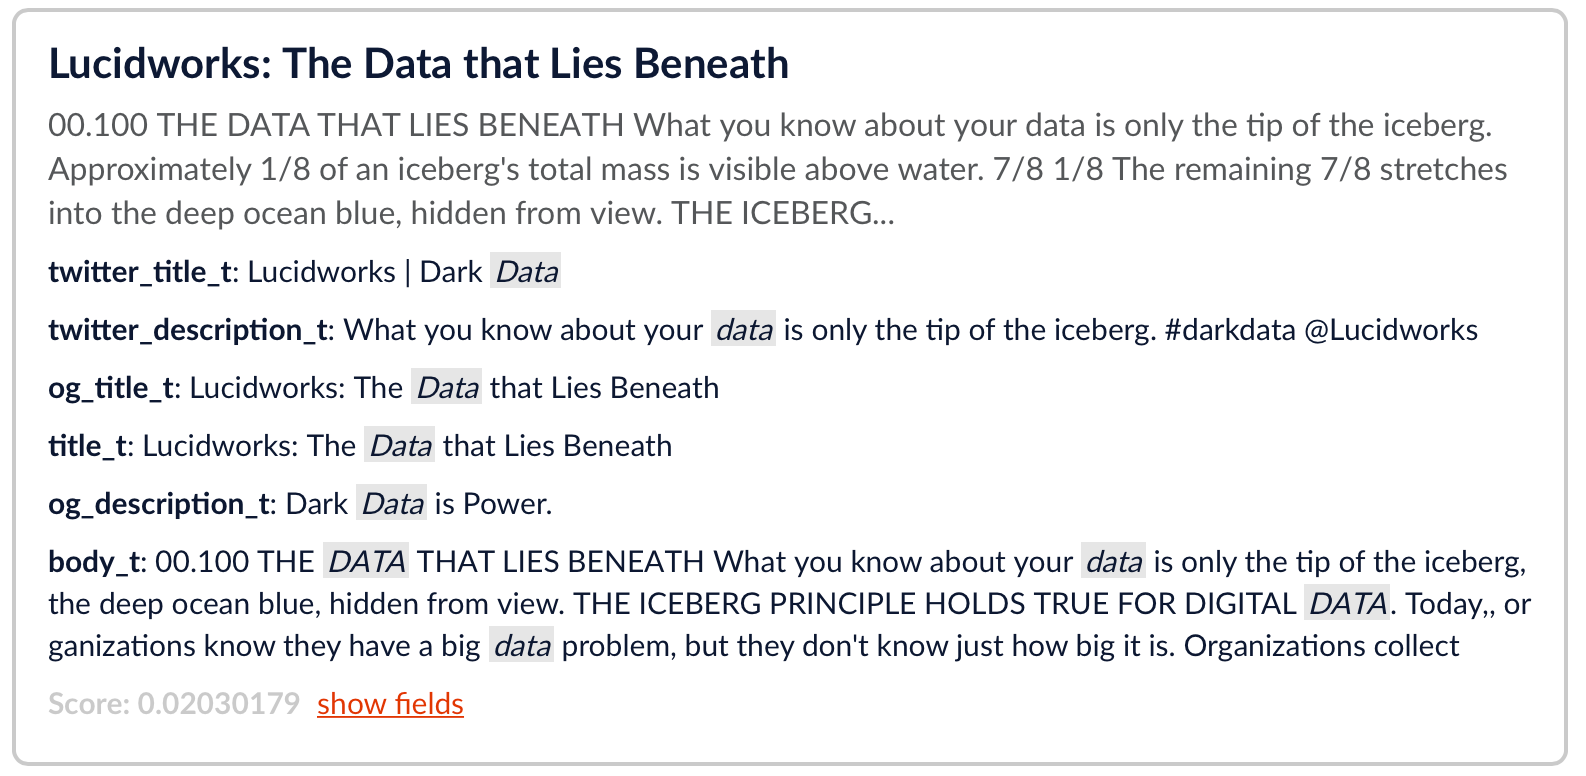
Pre/Post Tags
Most commonly, an HTML tag will be used pre and post the highlighted term for the presentation layer. By default, the HTML tag used for pre is <em> and for post is </em>. In addition, depending on the chosen highlighter, the parameter will either be hl.tag. (Original Highlighter) or hl.simple. . Any string can be used for the respective pre or post parameters.
For example, if we wanted to change to a <strong> HTML tag, we configure the following parameters:
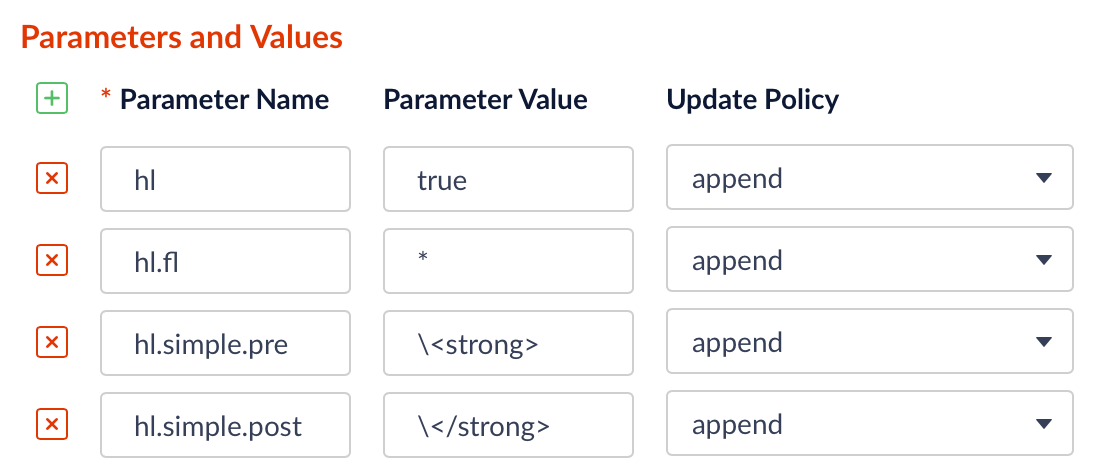
Note that the parameter value for an HTML tag must be escaped.
This would generate the following result:
The highlighting section of the Query Pipeline API response would also reflect this change:
...
"highlighting": {
"https://lucidworks.com/darkdata/": {
"twitter_title_t": [
"Lucidworks | Dark <strong>Data</strong>"
],
...
Solr Highlighters
Solr features different highlighters such as the original or default highlighter, the unified (new as of Solr 6.4) and FastVector. Each one has tradeoffs between accuracy and speed. Depending on your workload and needs, you may want to evaluate each one to see the performance based on searches for items such as terms, phrases and wildcards.
For a complete guide on choosing an appropriate highlighter, see the Fusion documentation.
Summary
Lucidworks Fusion provides a comprehensive workbench to configure and test highlighting of search terms within search results.
For further uses and configuration parameters, see the Fusion documentation.