Secure Fusion: Single Sign-On

Single Sign-On (SSO) mechanisms allow a user to use the same ID and password to gain access to a connected system or systems. In a web services or distributed computing environment, single sign-on can only be achieved by registering information about the sign-on authority with all systems that require its services. The previous article in this series Secure Fusion: Leveraging LDAP shows how to configure Fusion so that passwords and permissions are managed by an external LDAP server. Fusion can be configured to work with two more kinds of single sign-on mechanisms: Kerberos and SAML 2.0. This article covers the configuration details for both of these.
Fusion Logins and Security Realms
A Security Realm provides information about a domain, an authentication mechanism, and the permissions allotted to users from that domain. A Fusion instance can manage multiple security realms, which allows users from different domains to have access to specific Fusion collections.
For a non-native security realm, the domain and its user database exist outside of Fusion. Configuring Fusion for this realm simplifies the task of managing Fusion user accounts. Fusion need only store the username and user’s security realm; permissions for a specific user are inherited from the permissions defined for the users and groups belonging to that realm. It’s still possible to manage the permissions for that user directly in Fusion, but this goes against the principle of letting user management be somebody else’s problem.
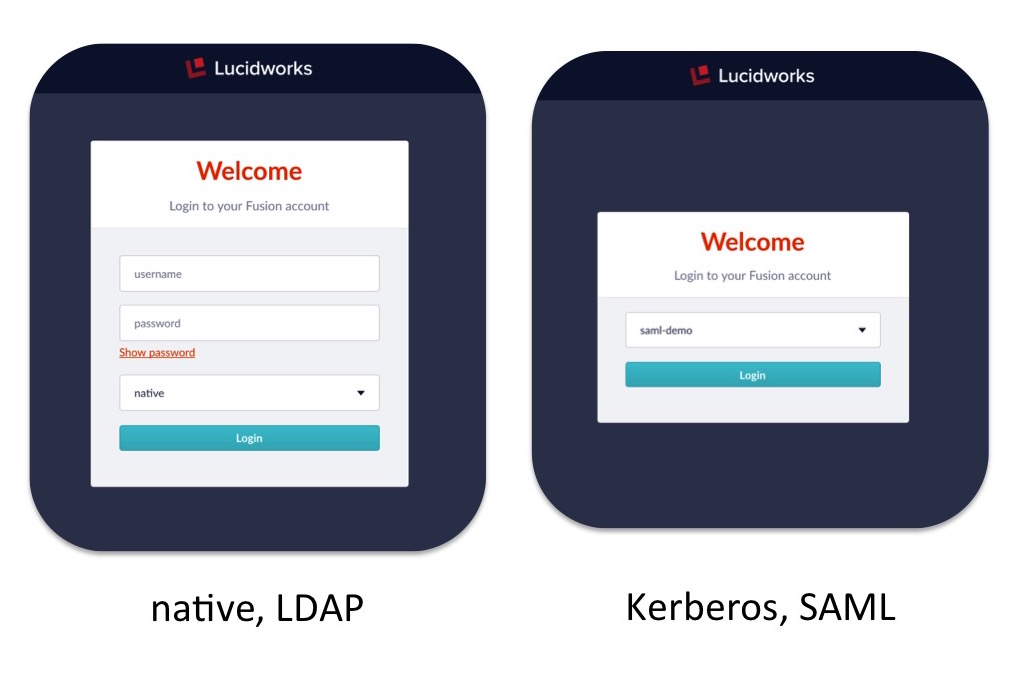
When you first access Fusion via the browser, the initial login panel has three inputs: user name, password, and an unlabeled pulldown menu for realm choices. Fusion’s native realm, which is always available, is the default realm choice. To login via a non-native realm, choose the appropriate realm name from the pulldown menu. Choosing a non-native realm may change the login panel inputs. For an LDAP realm, a user enters their LDAP username and password in the appropriate boxes on the login panel and Fusion relays this information to the LDAP server for that realm for authentication. To login to either a Kerberos or SAML realm, the login panel doesn’t have inputs for either. In the screenshot below, the screenshot on the left shows the login panel for a native or LDAP realm and the screenshot on the right shows the login panel for a SAML or Kerberos realm:
Since all Fusion logins requires a username and password, how does the auth magic happen? There is no magic, just some browser sleight-of-hand. For SAML and Kerberos logins the browser becomes the intermediary between Fusion and the authentication mechanism. Because the authentication process works indirectly through the browser, system configuration requires additional work beyond registering the security realm information in Fusion. In order to understand the configuration details, we present a quick overview of how SAML and Kerberos work.
SAML
SAML is a standard for exchanging authentication and authorization data between security domains. The SAML protocol allows web-browser single sign-on (SSO) through a sequence of messages sent to and from the browser, which relays information between Fusion and the SAML authority acting as the Identity Provider (IDP). To configure Fusion for SAML, you must register the information about the SAML authority as part of the security realm configuration process. In addition to configuring the Fusion security realm, you must configure the SAML identity provider to recognize the Fusion application.
Once Fusion is configured for a SAML realm, this realm is added to the list of available realms on the initial Fusion sign-on panel. When the SAML realm is chosen from the list of available realms, the browser then redirects to the IDP which handles user authentication. Upon successful authentication, the IDP sends a response back to the browser which contains authentication and authorization information as well as the URL of the Fusion application. The browser redirects back to the Fusion URL, passing along the SAML message with the user authentication and authorization information. Fusion then issues a session cookie which is used for subsequent user access.
Kerberos and SPNEGO
Kerberos
 The name Kerberos comes from Greek mythology where Kerberos (or Cerberus) is the ferocious three-headed guard dog of Hades, the original hellhound. Kerberos protocol messages are protected against eavesdropping and replay attacks. Instead of sending passwords in plaintext over the network, encrypted passwords are used to generate time-sensitive tickets used for authentication.
Kerberos uses symmetric-key cryptography and a trusted third party called a Key Distribution Center (KDC) to authenticate users to a suite of network services, where a user can be either an end user or a client program. The computers managed by that KDC and any secondary KDCs constitute a realm. A Kerberized process is one which has been configured so that it can get tickets from a KDC and negotiate with Kerberos-aware services.
The next several paragraphs outline the steps involved in the Kerberos protocol. It’s background information, so you can skip ahead to the next section on SPNEGO, as this is pretty dry stuff. We tried to get Margot Robbie to explain it for you but she wasn’t available, so instead we downloaded the following diagram from some old MSDN documentation, since Microsoft’s Active Directory uses Kerberos for its security infrastructure. It shows the essential steps in the Kerberos protocol, from initial login through authentication and authorization to application access:
Here is a summary of the steps outlined in the above cartoon, calling out the essential acronyms you need to know in order to configure Fusion for Kerberos authentication:
- Step 1. To login, the client sends a message to the KDC’s Authorization Server (AS) requesting a ticket granting ticket (TGT).
- Step 2. The Authorization Server verifies the user’s access rights and sends back an encrypted TGT and session key. At this point, the user is prompted for a password. The clear text password is encrypted before it is sent to the AS. If authentication succeeds, the user’s TGT will be valid for service requests.
Steps 1 and 2 happen only upon user login to the Kerberos realm, after which the TGT and session key are used to gain access to services in that realm.
- Step 3. To access a Kerberized service, the client sends a message to the KDC’s Ticket Granting Service (TGS) which includes identity information encrypted using the session key received in step 2.
- Step 4. The TGS verifies the request and creates a time-sensitive ticket for the requested service.
- Step 5. The client application now sends a service request to the server containing the ticket received in Step 4 as well as identity information encrypted using the session key received in step 2. The server verifies that the ticket and identity information match, then grants access to the service.
SPNEGO
If a client application wishes to use a Kerberized service, the client must also be Kerberized so that it can support the necessary ticket and message exchanges. Since Fusion is a web service, available either in a browser or via HTTP requests to Fusion’s REST-API, then the web application used to access Fusion must be able to carry out the Kerberos protocol in order for the end user to access Fusion.
SPNEGO was developed to extend Kerberos to web applications using the standard HTTP protocol, starting with Internet Explorer. Both IE and Safari support SPNEGO out-of-the-box, while Firefox and Chrome require additional configuration. The Unix curl command-line utility also supports SPNEGO; it can access a Kerberized web service using the negotiate command-line option.
When a Fusion user belonging to a Kerberos security domain sends a request to the Kerberized Fusion UI via a web application that supports SPNEGO, the web application sends a SPNEGO request via HTTP or HTTPS to Fusion and Fusion communicates with the Kerberos KDC to determine the identify and authorization status of that user. If the user hasn’t authenticated to the KDC/Authentication Service, Fusion sends a 401 response to the web application which contains a Negotiate header. This status/header response triggers SPNEGO compatible clients to fetch a local ticket from their Kerberos “ticket tray” and they then encode the ticket and send it back to Fusion. Fusion decodes the ticket and perform a SPN.doAs(user) authentication request to the KDC/Authentication Service. Depending on the results, Fusion will either execute the original request (along with a session cookie) or return a 401 (without the Negotiate) to the browser.
Fusion Configuration
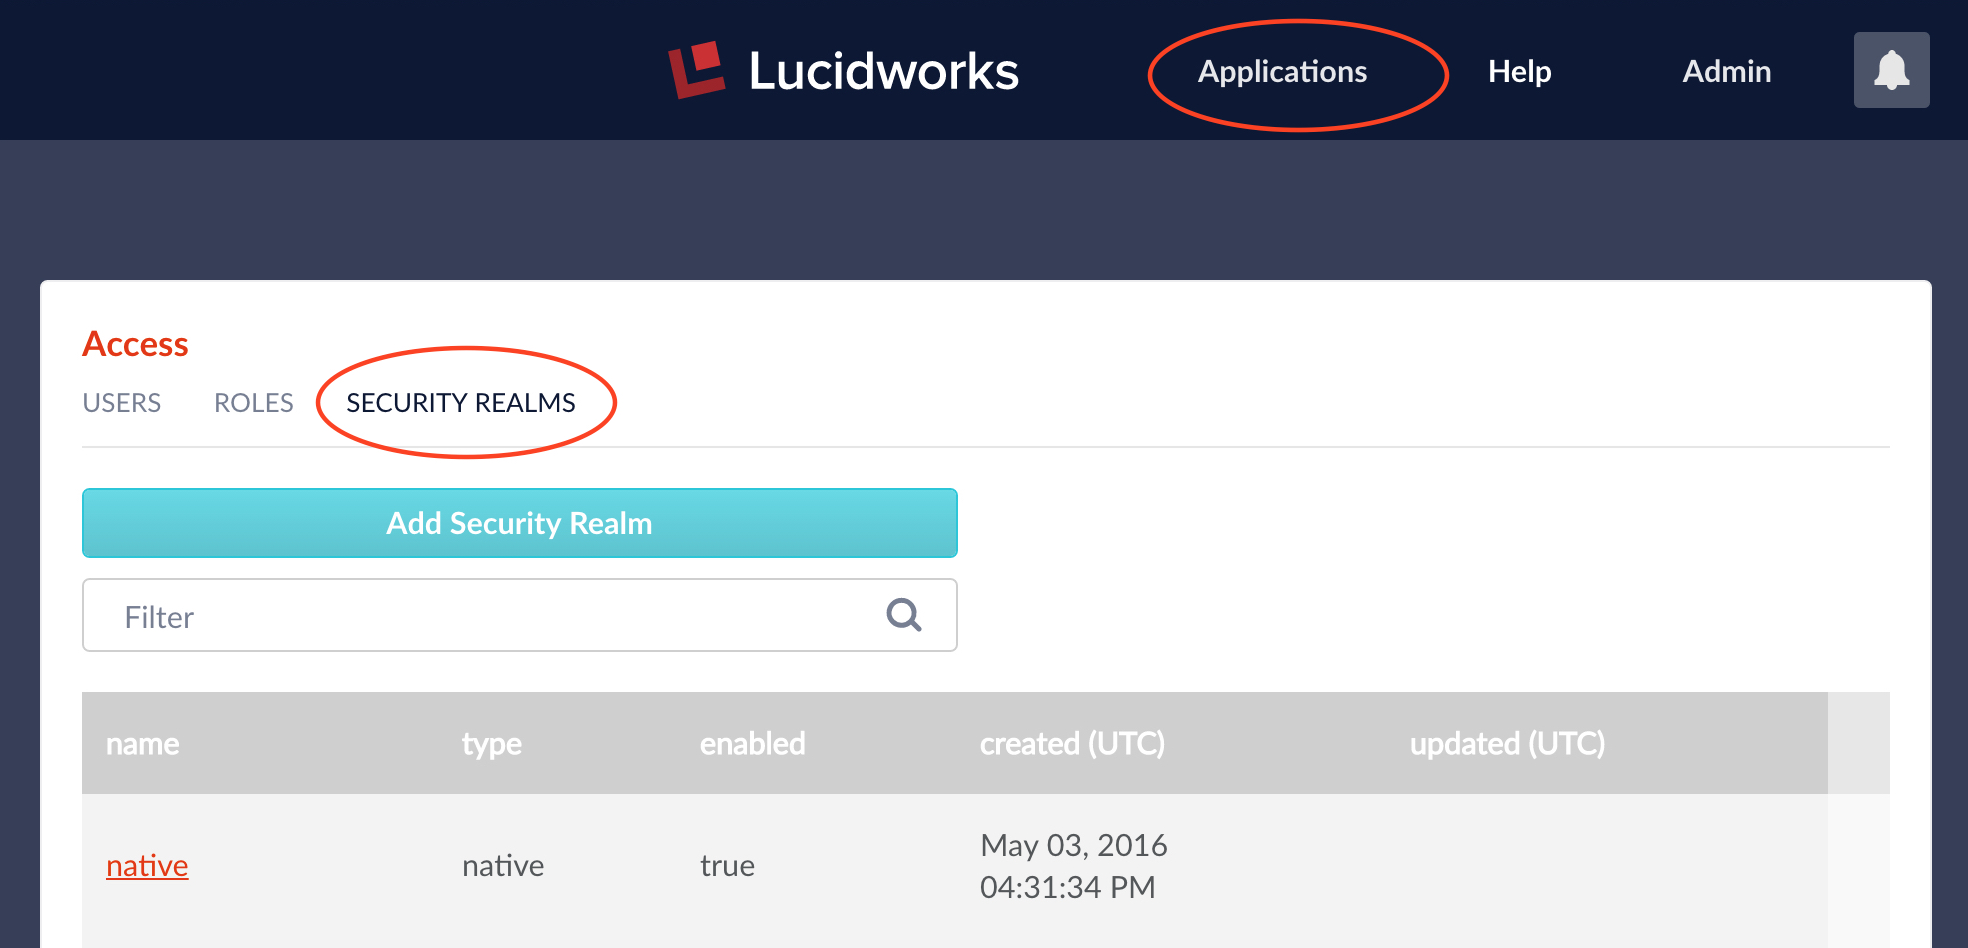
Configuring a new security realm can only be done by a Fusion user who has admin-level privileges. To configure a new security realm from the Fusion UI, from the “Applications” menu, choose menu item “Access Control”. This displays the Access control panel, which has sub-panel “Security Realms”. From the Security Realms sub-panel, click on the “Add Security Realm” button:
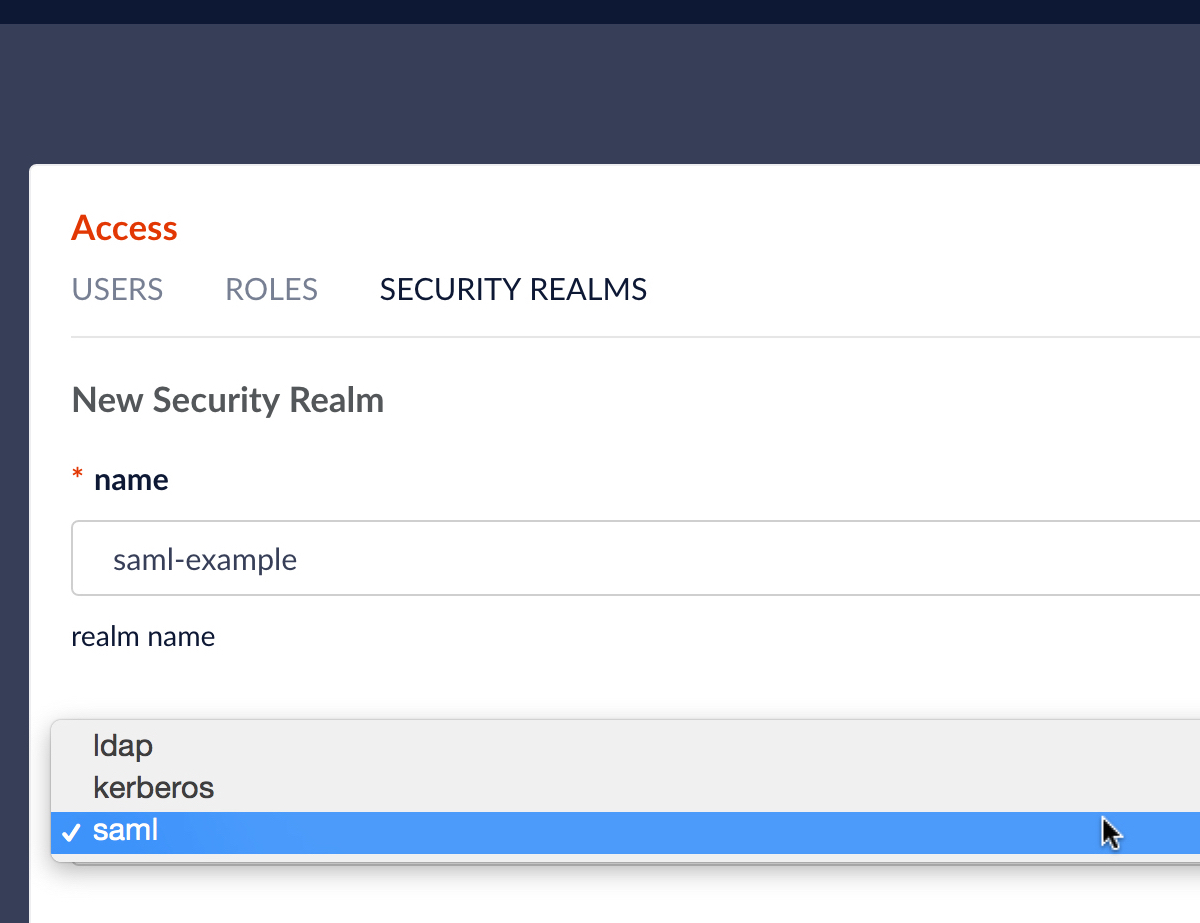
This opens an editor panel for a new Security Realm, containing controls and inputs for all required and optional configuration information. The security realm name must be unique. There is a pulldown menu from which to choose the realm type:
Configuring Fusion for a SAML security realm
To configure a SAML realm, the realm type is “SAML”. On the Fusion UI, there SAML realm configuration requires the following pieces of information:
- Identity Provider URL – the URL used by the SAML authority for single sign-on. Usually a URL which ends in “saml/sso”, e.g., “https://www.my-idp.com/<my-app-path>/sso/saml”
- Issuer – SAML Issuer Id. A unique ID for that authority, e.g. “http://www.my-idp.com/exk686w2xi5KTuSXz0h7”.
- Certificate Fingerprint – the contents of the SAML authority certificate, without the certificate header and footer. You must get this certificate from the SAML Identity Provider. The certificate is a text file which has a pair of header and footer lines which say “BEGIN CERTIFICATE” and “END CERTIFICATE”, respectively. The fingerprint consists of the lines between the header and the footer. You can cut and paste this information into the text box on the Fusion UI.
- User ID Attribute – an optional attribute. The Identity Provider contains the user database. By default, the Fusion username is the same as the login name known to the Identity Provider. When another field or attribute in the user record stored by the IDP should be used as the Fusion username, that attribute name is the value of the User ID Attribute. To know whether or not you need to specify the User ID attribute, you need to be able to examine the user database stored by the IDP.
In addition to configuring Fusion for SAML, you must register Fusion with the SAML IDP. The amount of information varies depending on the SAML authority.
All systems will require the Fusion URL to redirect to upon successful login; this is the protocol, server, and port for the Fusion application, and path “api/saml”, e.g. “https://www.my-fusion-app.com:8764/api/saml”. If the Fusion application is running behind a load-balancer, then this URL is the load-balancer URL plus path “api/saml”. Note that the load-balancer should be session-sticky in order for the sequence of messages that comprise the SAML protocol to run to completion successfully.
Some authorities may require additional information. In particular the SAML 2.0 “AudienceRestriction” tag may be part of the SAML message. This tag specifies the domain for which the SAML trust conditions are valid, which is usually the domain in which the Fusion app is running, e.g. “https://www.my-fusion-app”.
See the Fusion Documentation for example configurations.
Configuring Fusion for a Kerberos security realm
If the Fusion application running in a Kerberos security realm will be interacting with other resources in that realm, then it is critical that Fusion has the proper Kerberos authorization to access those resources. This is determined by the Fusion’s identity and credentials. Getting this information properly squared away will almost always require working together with the sys admin that is the keeper of Kerberos. Bring gifts.
To configure a a new Kerberos security realm, the realm type is either “Kerberos” or “LDAP”:
- To configure a realm which uses Kerberos for authentication and which doesn’t have an associated LDAP server for group-level permissions, choose option “Kerberos”.
- To configure a realm which uses Kerberos for authentication and which also gets group-level membership and permissions from an LDAP server, choose option “LDAP”, and then in the “Authentication Method” section of the LDAP realm configuration panel, choose “Kerberos”, as shown here:
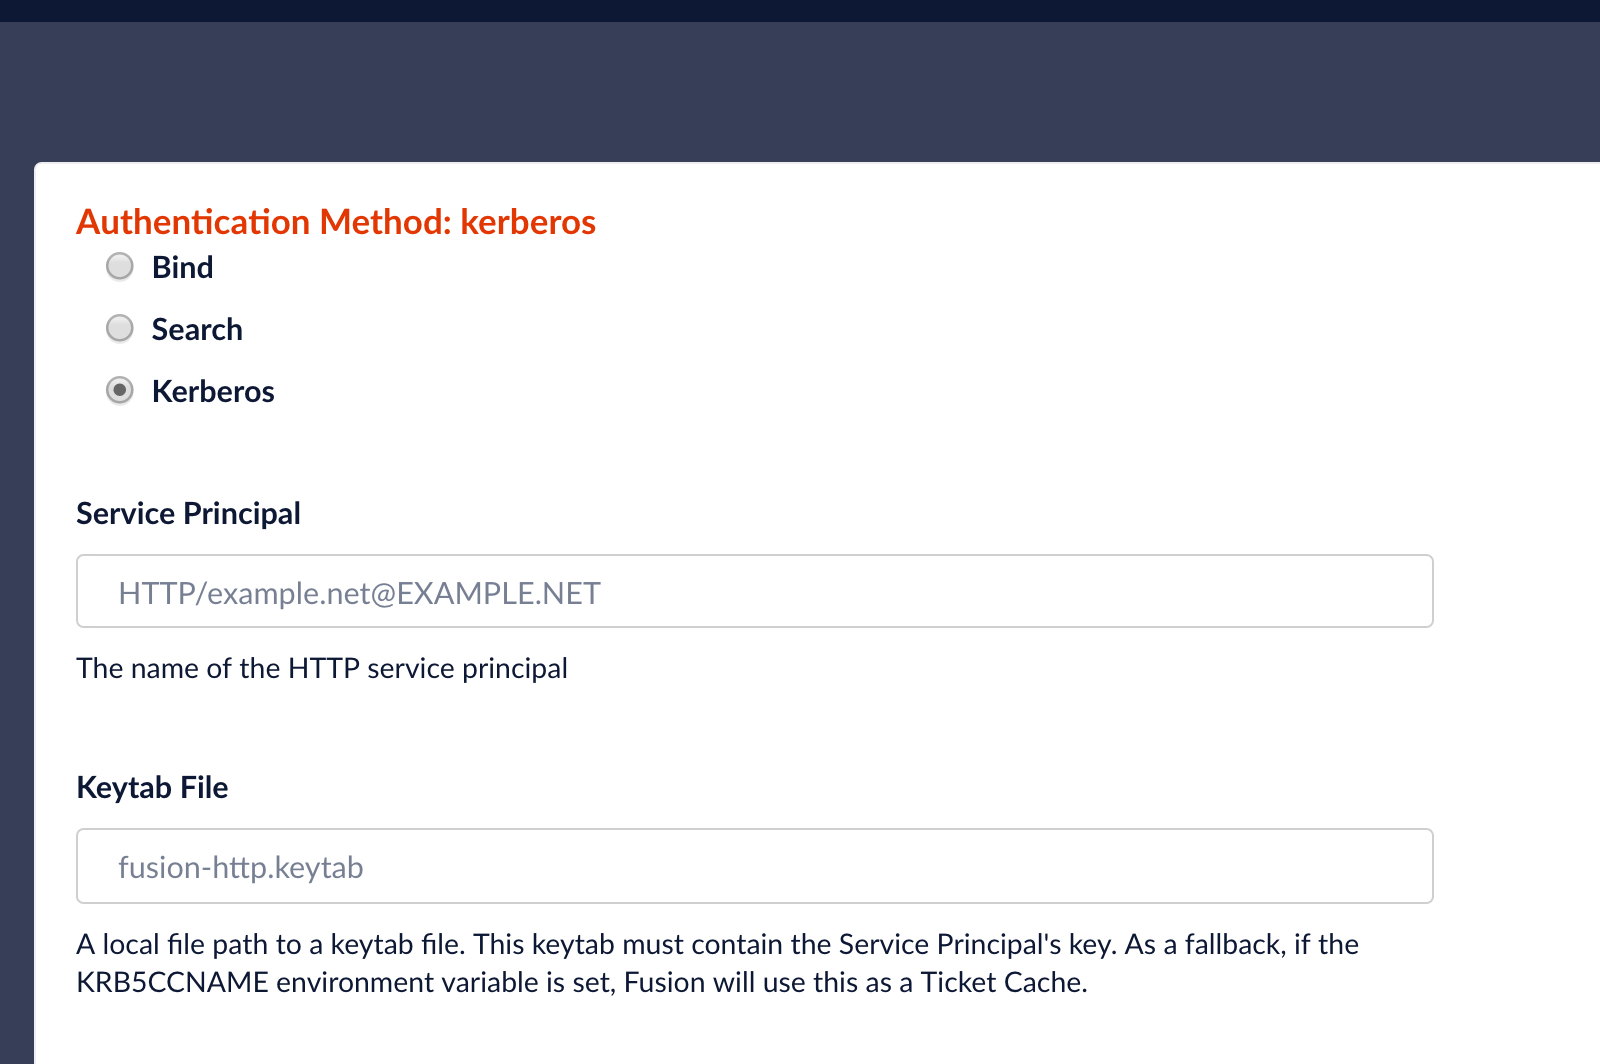
A Kerberos security realm requires two pieces of information:
- Service Principal Name – this is the name for the Fusion service itself in the Kerberos database.
- Keytab Path – the keytab files contains Fusion’s encrypted identity credentials which Fusion sends to the KDC during as part of the protocol described above.
The usual scenario in an enterprise organization is to have a Kerberos admin create a service principal with a random key password. Then, the admin generates a keytab, which is then used for Fusion service principal authentication.
See the Fusion Documentation on configuring Fusion for Kerberos for further details on keytab files and how to test them.
For Kerberos security realms which don’t use LDAP, the Fusion UI also displays inputs for the optional configuration parameter “Kerberos Name Rules”. These are used to specify what the Kerberos user’s Fusion username is. The default Fusion username is constructed by concatenating the Kerberos username, the “@” symbol, and the Kerberos domain name. E.g., user “any.user” in Kerberos domain “MYORG.ORG” will have the Fusion username “any.user@MYORG.ORG”.
Discussion
Fusion provides different types of security realms for different kinds of single sign-on mechanisms. The difference between the LDAP configuration, covered in the previous post in this series Leveraging LDAP, and the Kerberos and SAML mechanisms presented here is that for the latter, the dialog between Fusion and the servers which provides authentication and authorization is mediated by the browser.
In order for a Fusion application to work with a Kerberos or SAML realm, additional configuration steps are required outside of Fusion. In a Kerberized environment, there is a single Kerberos authority. Fusion itself is registered as a service with the Kerberos KDC. Once Fusion and the browser have been properly configured, Fusion can carry out the steps in the Kerberos/SPNEGO protocol. In SAML, everything is distributed, thus the Fusion application must be configured to work with the SAML authority and the SAML authority must be configured to work with Fusion. Checking you work is also more complicated; since Fusion doesn’t talk directly to the server, the configuration panels for Kerberos and SAML don’t provide a “test settings” control.
Configuring Fusion for single sign-on makes sense when there is a tight coupling between the owners and permissions on the documents in your collection and the individual users who have access to them. When your search application requires search over a collection with document-level security via ACLs, then you need to create a user account for all the users who can access those documents. Otherwise, Fusion’s native authentication mechanism is appropriate in situations where the users of the system fall into distinct categories and members of a category are interchangeable. In this case, you can define a set of generic users, one per category type, and assign permissions accordingly.
This is the fourth in a series of articles on securing your data in Lucidworks Fusion. Secure Fusion: SSL Configuration covers transport layer security and Secure Fusion: Authentication and Authorization covers general application-level security mechanisms in Fusion. This article and previous article Secure Fusion: Leveraging LDAP show how Fusion can be configured to work with external authority services, providing fine-grained security as needed. Fusion analyzes your data, your way, according to your access rules.
LEARN MORE
Contact us today to learn how Lucidworks can help your team create powerful search and discovery applications for your customers and employees.